When spending thousands of dollars per day on Facebook, spilt testing should be mandatory to keep acquisition costs as low as possible and to learn what works and what doesn’t.
The current way of split testing on Facebook is very complicated and stiff. For example, to split test you would need to create a number of different ad sets, but there have been problems such as:
1. Users could be lumped into both audiences (audience overlap), skewering results
2. You could not set each ad set to be shown an equal number of times
Setting up split testing on Facebook was a tedious process for account managers who had to promote dozens of products, and it wasn’t always effective.
But all that’s about to change with the introduction of Facebook’s new split testing feature.
How split testing works on Facebook
Facebook split testing allows you to test various ad sets against each other in a bunch of cool ways, avoiding the pain points I issued above.
Facebook’s split testing feature includes the following features:
No audience overlap – You can split an audience to ensure they won’t see both ads and for each ad to be shown an equal amount of time.
Testing variables – Set every ad set in the test to be identical apart from the testing variable. At this moment in time (December 2016) you can test one variable with a total of three variations.
Number of ad sets – You can split test up to three ad sets per test.
Budgeting – Facebook will suggest a minimum budget needed to conclude the split test (based on time needed to get enough data). Facebook suggests split tests should be run between three and fourteen days for optimal results.
Winner – When the test has ended, Facebook will email you the results of the test and declare the winner as the ad set with the lowest cost per goal.
You can currently use split testing by using the following objectives:
- Website conversions
- Mobile app installs
- Lead generation
When split testing audiences, you can currently only select from saved audiences. When testing for optimization, you can test for the following:
- Conversion window: one day/seven days
- Bid amount: manual and automatic
- Ad delivery: conversions, impressions, link clicks, and daily unique reach
- Placement: desktop or mobile
How to set up split testing
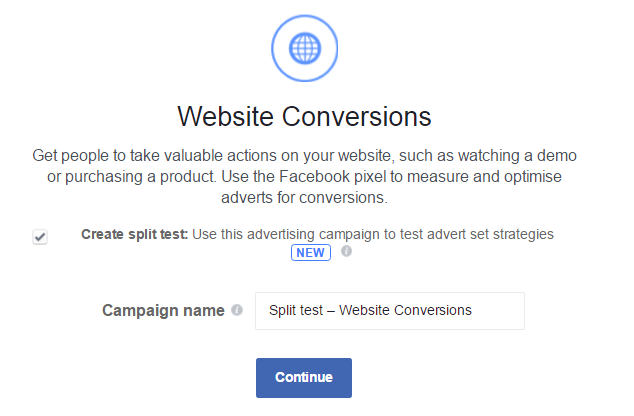
To start, select any of the objectives I’ve listed above. For this article I have gone with website conversions.
 You should be able to see the option ‘Create split test.’ Tick the checkbox and click continue.
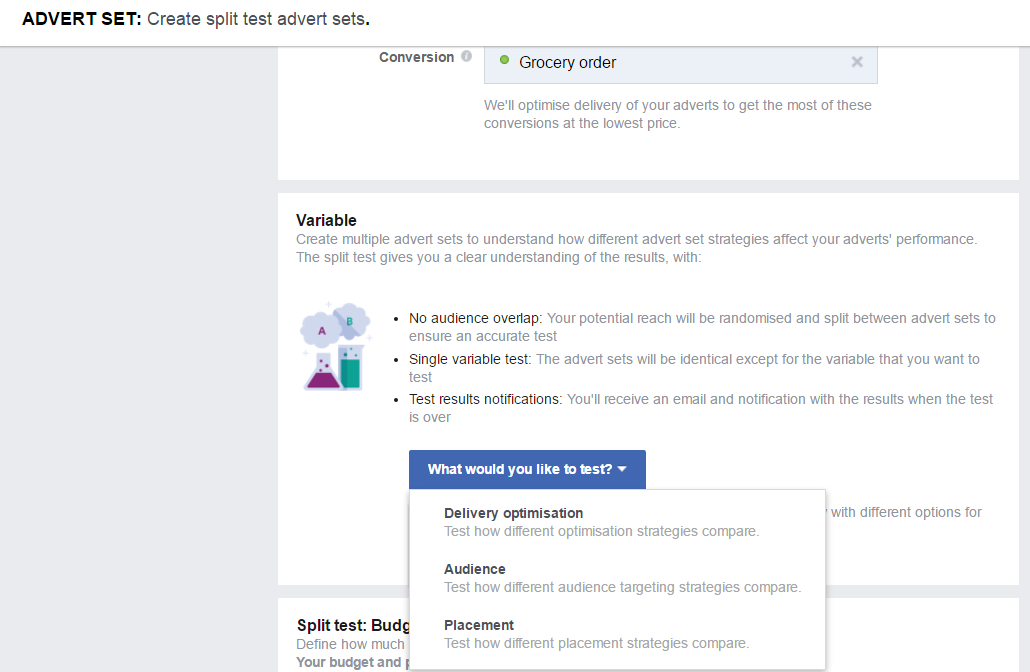
The first thing you will need to do is pick the variable you would like to test. You can choose from delivery optimization, audience, or placement.

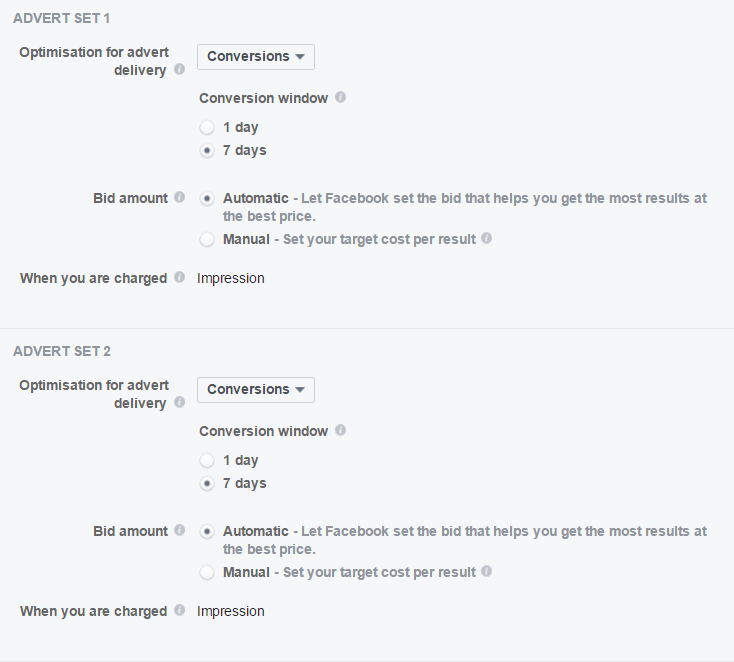
In this example I’ve selected the optimization for delivery. I am presented with options to adjust the optimization, conversion window, and bid amount for each ad set.

Make one variation from the two ad sets (the thing you want to split test for) and keep everything else the same. If you want to create a third ad set, there will be an option below to add a new ad set.
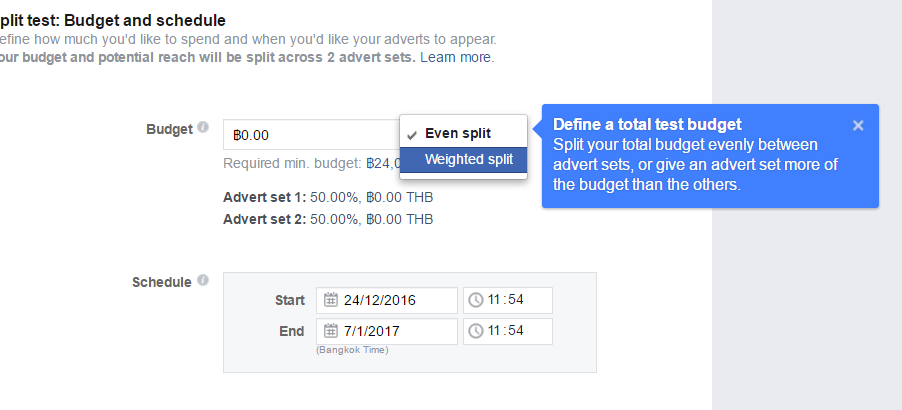
The final thing you will need to configure is the budget for your test.

You can choose between even split and weighted split.
Even split – This will split your budget equally between each ad set
Weighted split – Allows you to split your budget between each ad set as you see fit (65% / 35%, for example).
Once you’ve set up the testing parameters, you will create a single ad that will be used by all ad sets.
How will you use split testing on Facebook?
Split testing will provide you with more data on which interests and behaviors are worth more to your business, whether a website custom audience or engagement custom audience is worth more, and be able to compare a number of lookalike audiences.
For best practice purposes, avoid using two or more audiences in a single ad set as it will cloud your results.
You’ll also finally be able to learn whether you should be optimizing for website clicks or conversions and bidding options.
At least now when someone asks me:
“Hey, Steve, should I be optimizing for conversion or website clicks?”
I can redirect them to this article instead of going blue in the face answering a question I get asked on an almost daily basis.
If you’re spending thousands of dollars per day on Facebook, you should begin testing your audiences, placements, and bidding right away.
How will you be using split testing on Facebook?