Last week I talked about the newly updated Facebook Messenger and all the wonderful things you’ll soon be able to do with it.
In today’s article I’ll walk you through setting up Facebook Messenger Ads for your brand’s Facebook page.
Creating Your Message Button
To run Messenger Ads on the News Feed, you’ll need to set up (or change) the call-to-action on your page.
Head to your Facebook page and on the right-hand side you should see a blue call-to-action button.
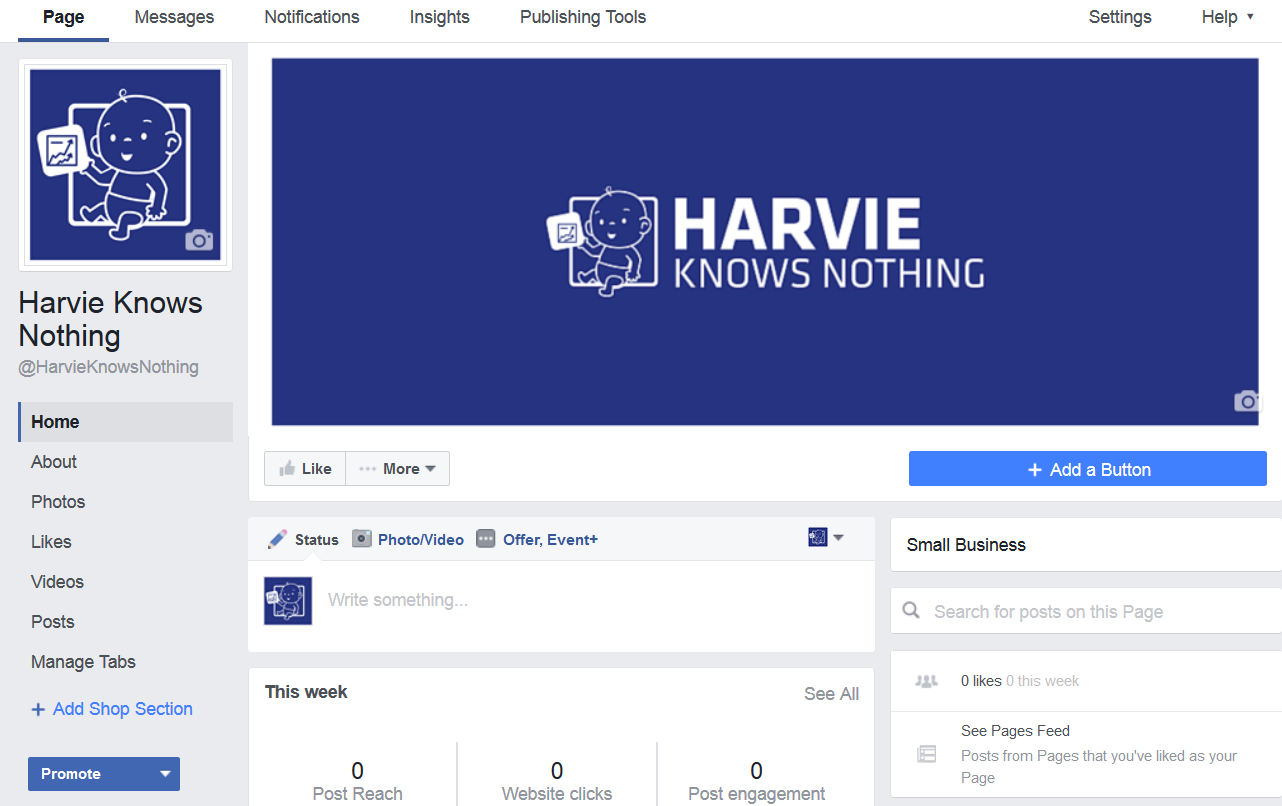
For my dummy page above, it says “+ Add a Button.” If you have already preset your call-to-action to send traffic to your website or contact you, then click on your button and select Edit Button. 
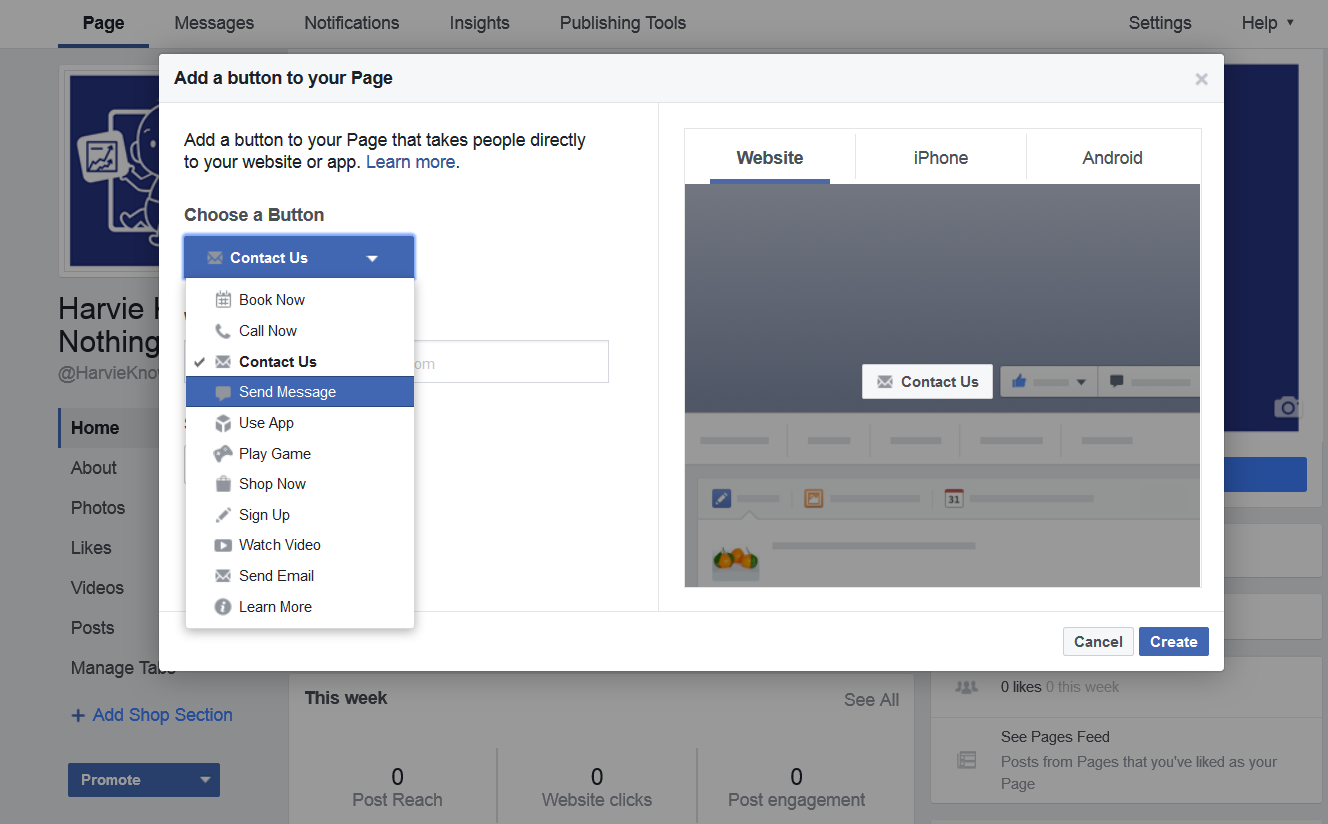
Facebook will then ask you to choose a relevant button as your call-to-action. From the drop-down list, select Send Message.
Before your button is launched, you can decide to turn on instant replies.
This option lets you send customers an instant message after contacting you. It’s best to tell them that you’ll reply back shortly and give a timeframe of when that should be. Think of instant replies much like an auto-responder email acknowledgment you send when someone contacts your business via email.

You can personalize your welcome message to add your website URL or address the user by their name by clicking the Add Personalization button.
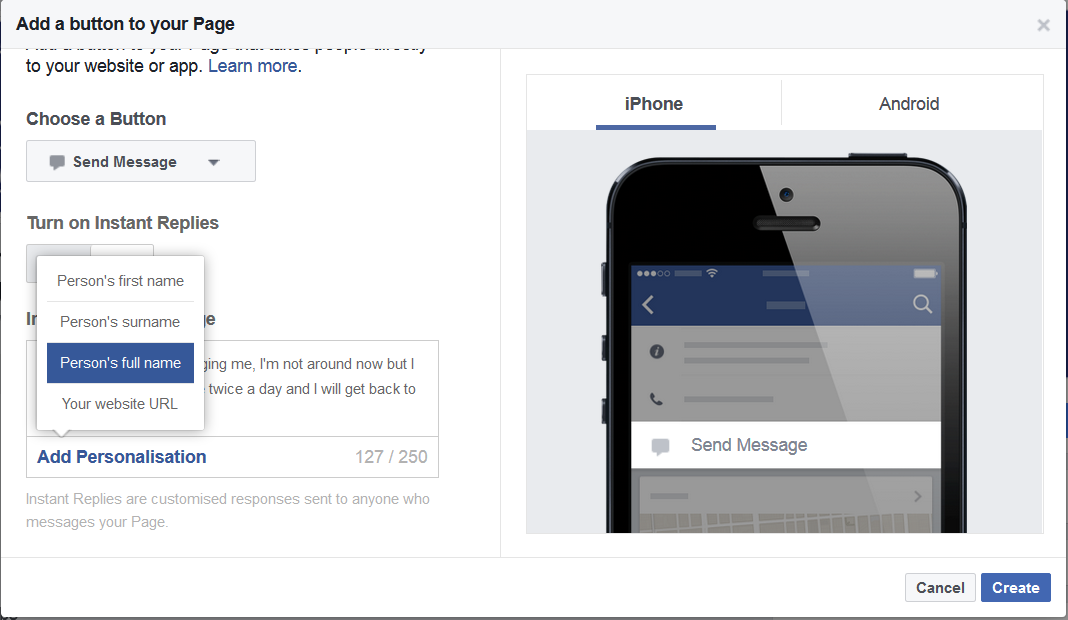
Once you’re happy with your message, click the Create button.
Promoting Your Button
There are two ways you can promote your Messenger button on Facebook.
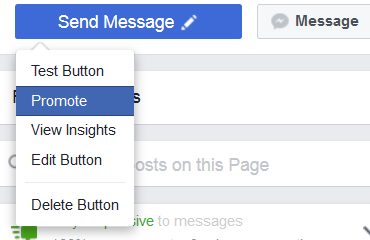
The first way is to click on your newly created button on your Facebook page and select Promote from the drop-down list.
This method quickly enables you to run your ad, but it isn’t ideal as it lacks several of the features you get using the Power Editor and the Ads Manager.
When using the Power Editor or Ads Manager (recommended), you must select the Clicks to website objective and ensure that you selected to show your ad on the mobile newsfeed, desktop newsfeed, or both.
- Note: you cannot serve Messenger ads on Instagram.
At the ad set level, Facebook will ask you for the destination of your ad. You’ll be able to select:
- Website URL
- Canvas
- Messenger
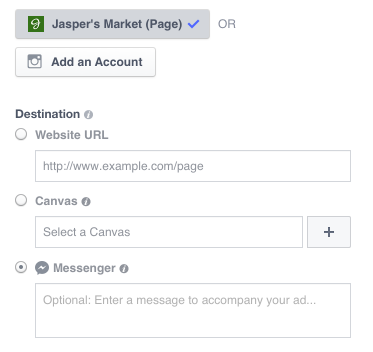 Select Messenger.
You’ll have the option to enter your pre-welcome message (very similar to the instant reply I discussed earlier). This piece of text will be sent before the user has messaged your business. For example, if you’re asking users to contact your business to schedule a free appointment, in your pre-welcome message tell them to state a date, time, and telephone number to ensure you have all the data needed.
Once you’re happy with the way your ad looks, hit Place Order and your Messenger Ad will be live once reviewed.
Setting Up Messenger
Outside of setting up Messenger Ads, you can also make additional adjustments to your bots to respond to people who contacted your page organically. To do this, click on the settings tab on your Page and from the left-side menu select Messenger.

Here you’ll be able to create preset messages based on a number of different actions a user makes.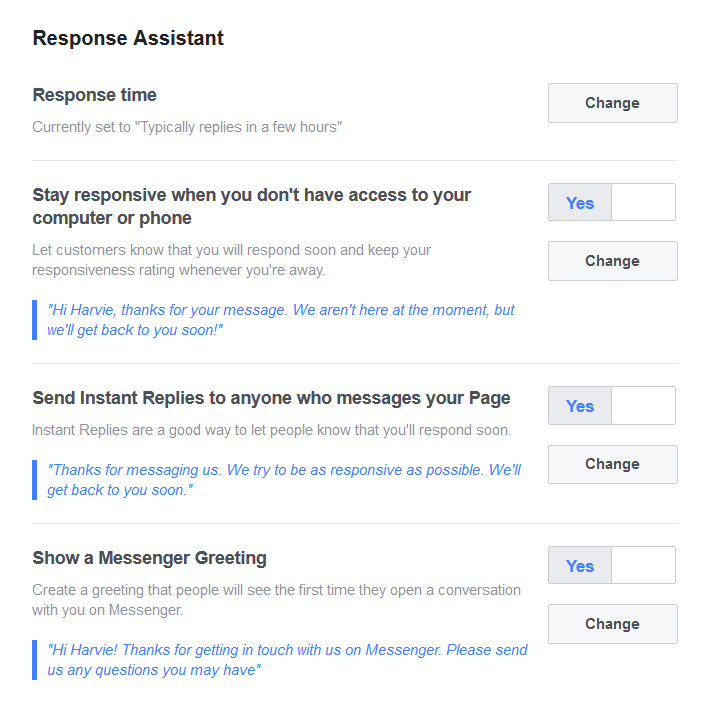
Lesson Over – Time to Implement
Setting up Messenger Ads on Facebook doesn’t take much time. Consider using Messenger Ads as a way to survey people at various levels of your sales funnel.
For example, ask customers what they think you should do to improve the products you sell, how they rate your customer service, or what type of content they would like you to produce.
Reach out to prospects at the start of your funnel (non-customers) and invite them to ask questions about your product/service. Use Messenger Ads as a way to remove the doubt and worry they have that’s stopping them from choosing your business.
You could even use Messenger Ads to run promotions and set your instant reply to a voucher code that users can only get by contacting your business.
There are 101 ways you can use Messenger Ads, and now you know how to set them up, you’ve no excuses for not getting started.