Many small businesses create campaigns using the Facebook Ads Manager but don’t understand how to get the most out of their Facebook ad experience.
This is usually because they are targeting only new prospects and aren’t fully aware of the depth of Facebook’s targeting ability. The truth is that re-marketing through Facebook custom audiences usually yields the highest gross return on investment (ROI).
To properly set up both Facebook re-marketing and Facebook conversion tracking you don’t need to be programming expert.
In this article, I will show you a step-by-step guide to creating your very own conversion pixel and custom audience.
How conversion pixels work
A conversion pixel is a tool that measures a specific action a prospect took after clicking your Facebook ad. The action can be anything from taking your lead magnet, putting a product into their shopping cart to actually purchasing.
A conversion pixel will also let you know which ads are working and the true ROI of each campaign you run.
Conversion pixel measures the total number of conversions, how many people the ad reached, how much you spent and the average cost per conversion.
For example, let’s assume you want to track one Facebook ad to measure how many direct sales it produced. To do this you would place a conversion pixel on your thank you page (as it’s only possible to reach this page once a customer has completed a transaction). Each time a prospect clicks your Facebook ad and makes it to the thank you page, they will be tracked as a conversion.
A conversion pixel is a small piece of code which you can copy and paste onto the page you want to track. If you have someone who handles your website, they will know where it goes, if you don’t, Facebook gives you step-by-step instructions on how to do it yourself:
![]()
There is no limit to the amount of conversion pixels you can create. Ideally, you would want one for each step of your sales funnel, to measure its success and to find bottlenecks that stop prospects and customers from reaching the next stage.
Setting up a conversion pixel
To setup a conversion pixel, head to the Facebook Ads Manager, then select Tools and Conversion Tracking:
![]()
You can track a number of different conversions, these include:
![]()
If you’re looking to track people who place items into their basket but don’t purchase, you should select Adds to Basket. When wanting to track how many sales then Checkouts is preferred, while Registrations and Leads are commonly tracked to measure opt-ins. After you select what you want to measure, click Create Pixel and you will be given a code which you place on your website.
Once your code is placed on your website, visit Conversion Tracking through the Facebook Ads Manager and ensure it’s up and running:
![]()
I have 5 conversion pixels and only one is active (the other 4 were just tests). If you don’t have someone managing your website and you use WordPress, the Facebook Conversion Pixel plugin will add your pixel without you having to mess with the code. If you’re not using WordPress and are having trouble installing your pixel, visit the Chrome Store and download FB Pixel Helper for free. This tool will troubleshoot what’s going wrong and how to fix it.
Note: you must be using Google Chrome to use the FB Pixel Helper.
Setting a value for conversion pixels
As default, each conversion is tracked at $0.00. It’s best to change this amount to what your product actually costs.
Let’s assume you sell a single product priced at $99, and you want to value each successful conversion at $99. To achieve this you simply need to edit your conversion pixel.
Below is what a typical pixel code will look like. I’ve highlighted the numerical value “0.00” which is what you need to edit:
![]()
You replace the ‘0.00’ to the value of your product. In this case we would change ‘0.00’ to ‘99.00’.
Each a time a Facebook ad makes a conversion, each conversion will be valued at $99 instead of $0.
How Custom audiences work
Facebook custom audiences allow you to create a group of targeted prospects (based on your parameters) who can be segmented by age, gender, interests and more. For example, let’s assume a prospect visits your website, views a specific product page and leaves without purchasing.
Facebook custom audiences can track that prospect and place them in a list. Now let’s assume 10,000 shoppers visited the same page, and 9,000 left without buying.
You now have a custom audience of 9,000 prospects who you can show a highly targeted ad (the product they viewed) and use re-targeting to get them to complete the action.
I recently visited Vidyard and didn’t opt-in to their list or purchase any products, and guess what? I’m tracked in their custom audience and am being re-targeted on Facebook:
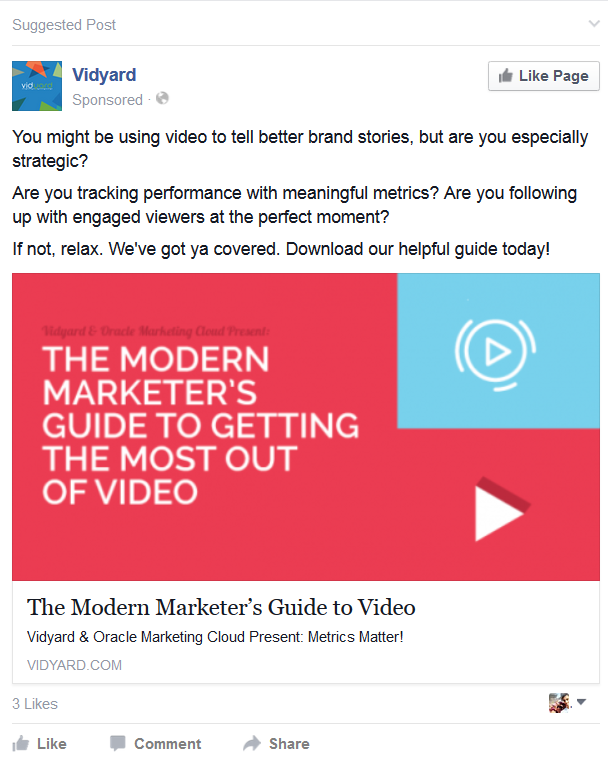
This is how custom audiences work.
How to setup a custom audience
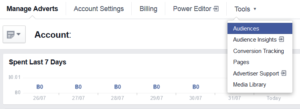
Setting up a custom audience is simple. Head to the Facebook Ads Manager and select Tools and then Audiences:
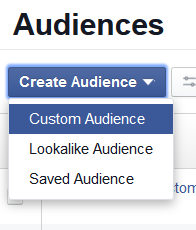
On the Audiences page, go to Create Audience and select Custom Audience:
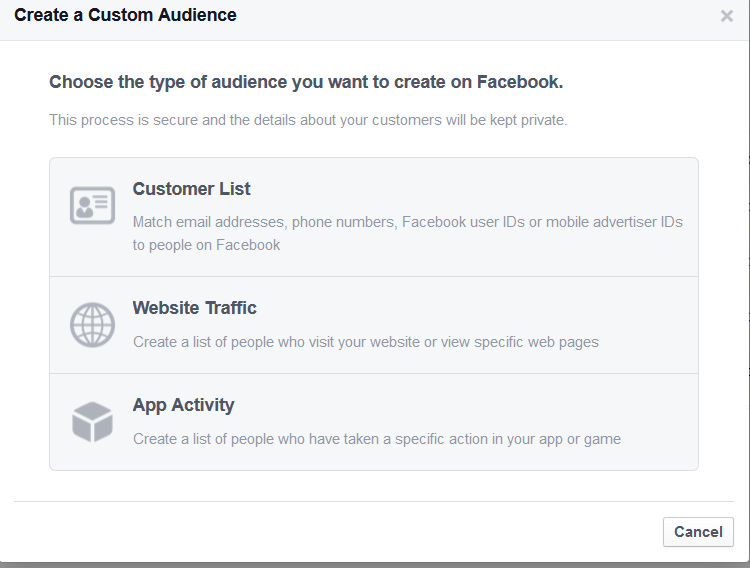
Then select Website Traffic (in this example we are tracking website visitors):
Next you will be asked who you want to track:
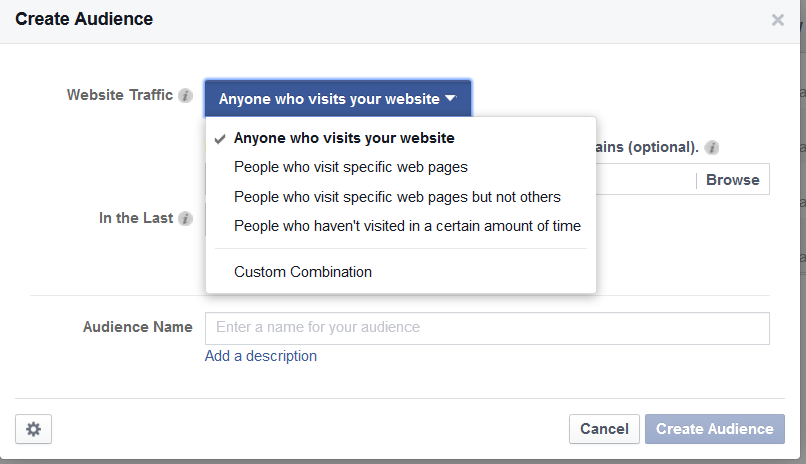
This will depend on your goal and what you want to measure. Keep in mind you can only create one custom audience per Facebook account, meaning you’re only allowed to place one custom audience pixel on your website.
You can track prospects from 1-180 days before they are removed from the custom audience. If your website receives thousands of views per day, it’s better to reduce the amount of days to track. This ensures prospects in your list have your business fresh in their minds. If your websites doesn’t receive too much traffic, then increasing the amount of days to track is better get more impressions.
After you click Create Audience, your will be redirect to a page where you can get your tracking code and place it on your website. Place the code in the header or footer of your website.
Why should you use conversion pixels and custom audiences
It can be hard to know whether your last Facebook ad was a success or failure. Conversion pixels help you understand the actions prospects take when they click your ads, and whether the copy, heading or targeting options are working.
Custom audiences are great because data has shown us that there’s a 70% greater chance of increasing conversions through re-targeting than cold advertising. Creating ads on the fly targeting new prospects to buy your products is always going to be hard, your business has next to no social proofing, they may not trust you or even be interested in your product or service.
This is the perfect recipe for maxing out a marketing budget and seeing very little in return. Leveraging Facebook custom audiences lets you place ads in front of prospects who are most interested in your brand, this type of prospect is always going to be easier to convert.
Summary
If you’ve ever used Facebook or any other form of paid online marketing, how did your last 3 campaigns go? Were you happy with the results and investment? Or were results poorer than you’d hoped? Using custom audiences and conversion pixels are pretty straight forward, take less than 10 minutes to setup and provide some of the best PPC returns online.
Even if you don’t plan on running any Facebook campaigns soon, there are zero downsides to setting up a custom audience pixel on your website today to build a highly targeted Facebook list.